Contrast Stretch Transformation
This transformations is used to automatically enhance the contrast of the image by using the full range of intensity values that a particular image format allows. This basically means that the lighter portions of the image would become even lighter and the darker portions of the image would become even brighter, thereby enhancing the contrast.
Syntax
e-contrast
Let's look at some examples to see how contrast stretching works.
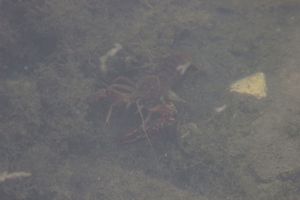
1. Normal Image
(Source : Wikimedia Commons)
https://ik.imagekit.io/demo/tr:w-300/low_contrast_SygP9K4om.jpg
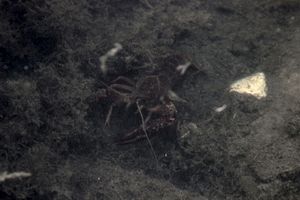
2. With Contrast stretching applied
The image is much more clearer, with more detail visible than the original image.
https://ik.imagekit.io/demo/tr:w-300,e-contrast/low_contrast_SygP9K4om.jpg
Sharpen Transformation
As the name suggest, this transform sharpens the input image. It is useful to highlight the edges and finer details in the image. Sharpening is applied particularlt to the detail edges in an image (for example - edge of one object in the image).
Syntax
e-sharpen<-number>
'number' is optional and controls the amount of sharpening
If just e-sharpen is used, then a default sharpening is performed on the image. This behavior can be controlled by specifying a number that controls the extent of sharpening performed - higher the number, more the sharpening.
Let's look at some examples to see how contrast stretching works.
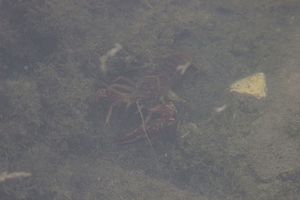
1. Normal Image
(Source : Wikimedia Commons)
https://ik.imagekit.io/demo/tr:w-300/low_contrast_SygP9K4om.jpg
2. Default sharpening applied
The edges are clearer in this image compared to the original.
https://ik.imagekit.io/demo/tr:w-300,e-sharpen/low_contrast_SygP9K4om.jpg
3. Increasing the sharpening applied
The edges are even clearer and sharper in this image. The result are different from contrast stretching.
https://ik.imagekit.io/demo/tr:w-300,e-sharpen-10/low_contrast_SygP9K4om.jpg

Unsharp Mask Transformation
Unsharp masking (USM) is an image sharpening technique. This transform allows you to apply and control unsharp mask on your images. The amount of sharpening can be controlled by varying the 4 parameters - radius, sigma, amount and threshold. This results in perceptually better images compared to just e-sharpen.
You can read more about the unsharp masking technique on Wikipedia and Cambridge Colour apart from other resources on the internet. While most resources talk only about radius, amount and threshold parameters, the sigma parameter is the standard deviation, used as an input to the unsharp masking process.
Syntax
e-usm-<radius>-<sigma>-<amount>-<threshold>
Here 'radius', 'sigma', 'amount' and 'threshold' have to be positive floating point values
Let's look at some examples to see how contrast stretching works.
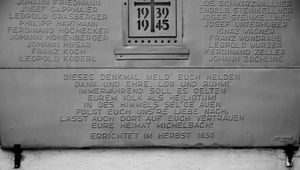
1. Normal Image
(Source : Wikimedia Commons)
https://ik.imagekit.io/demo/img/tr:w-300/low_sharpness_text_BJR9wqVjm.jpg

2. Unsharp Mask applied to the image
The text in this image is much sharper and readable as compared to the original image.
https://ik.imagekit.io/demo/tr:w-300,e-usm-4-2-0.8-0.024/low_sharpness_text_BJR9wqVjm.jpg
Grayscale Transformation
This transformation simply provides a grayscale variant of the input image.
Syntax
e-grayscale
Example
1. Grayscale image
https://ik.imagekit.io/demo/tr:w-300,e-grayscale/low_sharpness_text_BJR9wqVjm.jpg
If you have any questions about the above transformations, please reach out to us by creating a support ticket from your ImageKit dashboard.